Writing WPF Desktop Apps with JavaScript
Published: 3/21/2026 | Author: DevScholar
Writing WPF Desktop Apps with JavaScript
Windows Presentation Foundation (WPF) is a UI framework introduced by Microsoft in the .NET Framework 3.0 era. Compared to the previous generation WinForms, it introduced modern features like XAML markup language, data binding, style templates, and vector graphics rendering. WPF’s design philosophy is to separate interface from logic, with interface described declaratively in XAML and logic handled in code, but in Node PS1 for .NET we build interfaces directly with JavaScript code, a style closer to traditional WinForms programming, just using WPF’s controls and layout system.
WPF requires loading three core assemblies: PresentationFramework contains control and window types, PresentationCore contains graphics and media-related base types, and WindowsBase contains dependency properties, events, and other infrastructure. After loading, you can access WPF’s type system through dotnet.System.Windows.
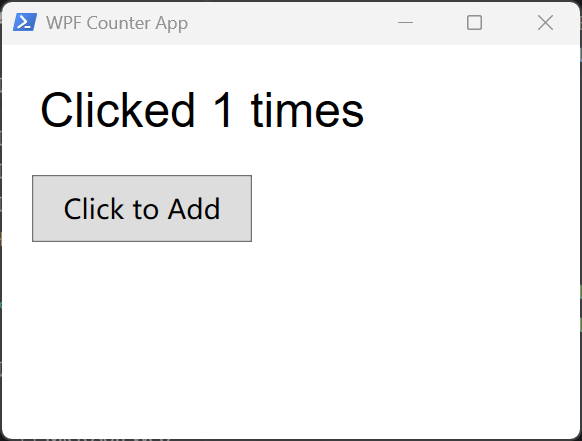
WPF’s layout system is fundamentally different from WinForms. WinForms uses absolute positioning, with controls having a Location property to specify coordinates. WPF uses layout containers, which are responsible for arranging the position and size of child controls. Common containers include StackPanel (stack arrangement), Grid (grid layout), Canvas (absolute positioning), WrapPanel (wrap arrangement), etc. The following counter example uses StackPanel as the root container, and child controls will be arranged from top to bottom in the order they are added.
import dotnet from '@devscholar/node-ps1-dotnet';

dotnet.load('PresentationFramework');
dotnet.load('PresentationCore');
dotnet.load('WindowsBase');

const System = dotnet.System as any;
const Windows = System.Windows;
const Controls = System.Windows.Controls;
const Media = System.Windows.Media;

let clickCount = 0;

const mainWindow = new Windows.Window();
mainWindow.Title = "WPF Counter App";
mainWindow.Width = 400;
mainWindow.Height = 300;
mainWindow.WindowStartupLocation = Windows.WindowStartupLocation.CenterScreen;

const stackPanel = new Controls.StackPanel();
stackPanel.Margin = new Windows.Thickness(20);
stackPanel.HorizontalAlignment = Windows.HorizontalAlignment.Center;
stackPanel.VerticalAlignment = Windows.VerticalAlignment.Center;

const label = new Controls.Label();
label.Content = "Clicks: 0";
label.FontSize = 32;
label.FontFamily = new Media.FontFamily("Arial");
label.HorizontalContentAlignment = Windows.HorizontalAlignment.Center;
label.Margin = new Windows.Thickness(0, 0, 0, 20);
stackPanel.Children.Add(label);

const button = new Controls.Button();
button.Content = "Click to Add";
button.FontSize = 18;
button.Padding = new Windows.Thickness(20, 10, 20, 10);
button.HorizontalAlignment = Windows.HorizontalAlignment.Center;

button.add_Click((sender: any, e: any) => {
    clickCount++;
    label.Content = `Clicked ${clickCount} times`;
});

stackPanel.Children.Add(button);

mainWindow.Content = stackPanel;

const app = new Windows.Application();
app.Run(mainWindow);
WPF margins use the Thickness type, which can set margins for all four directions simultaneously. The constructor accepts four parameters in order: left, top, right, bottom. The Content property of controls is used to set content, for Label to display text you set Content to a string, same for Button. HorizontalAlignment and VerticalAlignment control how the control aligns within the container, setting to Center means center alignment.
Setting the window’s WindowStartupLocation property to CenterScreen makes the window display centered at startup, which is more intuitive than WinForms using enum value 1. Finally, create an Application instance and call the Run method to start the message loop, similar to WinForms.
Let’s look at a draggable box example, which demonstrates the use of Canvas layout and coordinate transforms. Canvas is the only layout container in WPF that supports absolute positioning, with child controls positioned through Canvas.Left and Canvas.Top attached properties. But here we use another approach, TranslateTransform, which can move a control’s rendering position without changing its actual position property, a method with better performance suitable for frequently updated scenarios.
import dotnet from '@devscholar/node-ps1-dotnet';

dotnet.load('PresentationFramework');
dotnet.load('PresentationCore');
dotnet.load('WindowsBase');

const System = dotnet.System as any;
const Windows = System.Windows;
const Controls = System.Windows.Controls;
const Media = System.Windows.Media;

const mainWindow = new Windows.Window();
mainWindow.Title = "WPF Draggable Box Example";
mainWindow.Width = 800;
mainWindow.Height = 600;
mainWindow.WindowStartupLocation = Windows.WindowStartupLocation.CenterScreen;

const canvas = new Controls.Canvas();
canvas.Background = Media.Brushes.LightGray;

const box = new Controls.Border();
box.Width = 100;
box.Height = 100;
box.Background = Media.Brushes.Red;
box.BorderBrush = Media.Brushes.DarkRed;
box.BorderThickness = new Windows.Thickness(2);

const transform = new Media.TranslateTransform();
box.RenderTransform = transform;

transform.X = 350;
transform.Y = 250;

canvas.Children.Add(box);

let isDragging = false;
let startMouseX = 0;
let startMouseY = 0;
let startBoxX = 0;
let startBoxY = 0;

box.add_MouseDown((sender: any, e: any) => {
    isDragging = true;
    const pos = e.GetPosition(canvas);
    startMouseX = pos.X;
    startMouseY = pos.Y;
    startBoxX = transform.X;
    startBoxY = transform.Y;
    box.Background = Media.Brushes.DarkRed;
    box.CaptureMouse();
});

box.add_MouseUp((sender: any, e: any) => {
    isDragging = false;
    box.Background = Media.Brushes.Red;
    box.ReleaseMouseCapture();
});

box.add_MouseMove((sender: any, e: any) => {
    if (isDragging) {
        const currentPos = e.GetPosition(canvas);
        transform.X = startBoxX + (currentPos.X - startMouseX);
        transform.Y = startBoxY + (currentPos.Y - startMouseY);
    }
});

mainWindow.Content = canvas;

const app = new Windows.Application();
app.Run(mainWindow);
The Border control is a decorator that can add borders and backgrounds to child content, here we use it as a bordered colored block. The Background property accepts a Brush type, and Media.Brushes provides a series of predefined solid color brushes. The RenderTransform property can set any transform, TranslateTransform is a translation transform, modifying its X and Y properties moves the control.
In mouse event handling, the e.GetPosition(canvas) method gets the mouse coordinates relative to the canvas, a WPF-specific design that makes it easy to get the position relative to any element. CaptureMouse and ReleaseMouseCapture are used to capture and release the mouse, after capturing the mouse you can continue to receive mouse movement events even if the mouse moves outside the control range, which is important for drag operations.
The advantage of WPF over WinForms is a more modern rendering architecture. WPF is based on DirectX, supporting hardware acceleration, vector graphics, transparency effects, animations, and other features. The layout system is also more flexible, making it easier to create adaptive-sized interfaces. The downside is a steeper learning curve with more concepts, and typically higher memory usage than WinForms. If you only need simple tool windows, WinForms might be more suitable. If you need complex interface effects or plan to migrate to web technology later, WPF is the better choice.
The running method is the same as WinForms examples, execute node start.js your-file.ts. For more examples, refer to the wpf directory in the node-ps1-dotnet-examples repository.